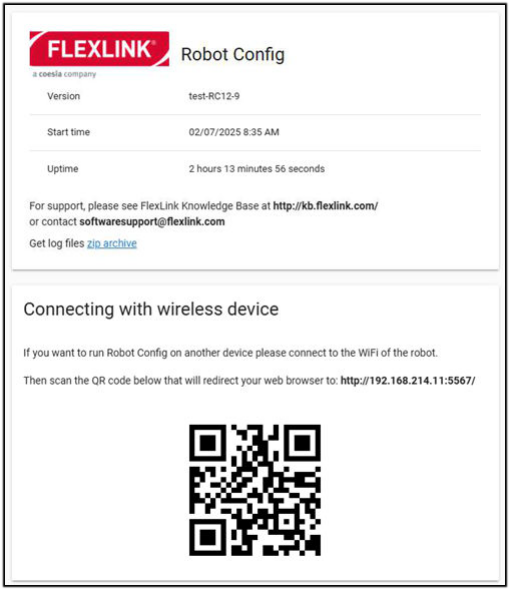
How to get into Robot config page:
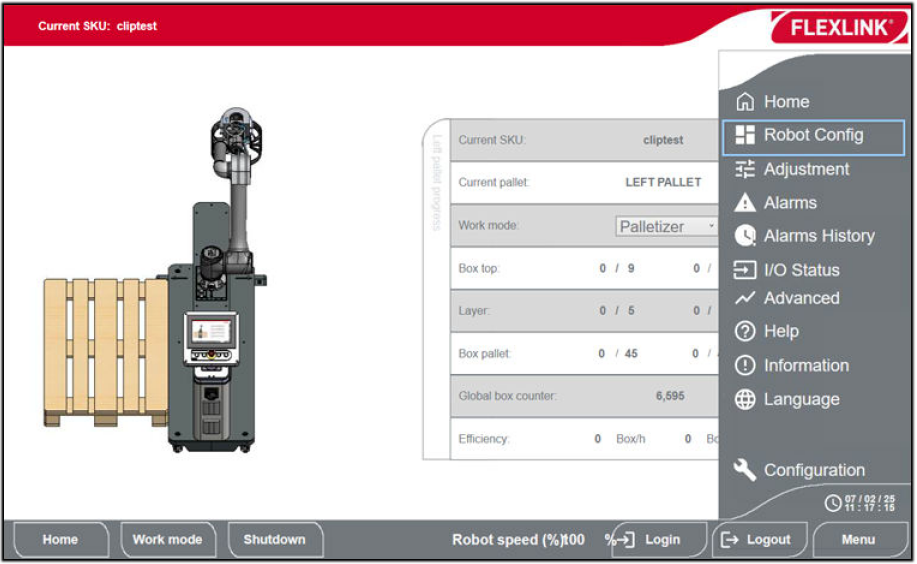
a) On the robot HMI tap the following to access the Robot config:
Menu and Robot config.
b) connect to the internal robot WiFi and type IP: 192.168.214.11:5567
1.1. Main page
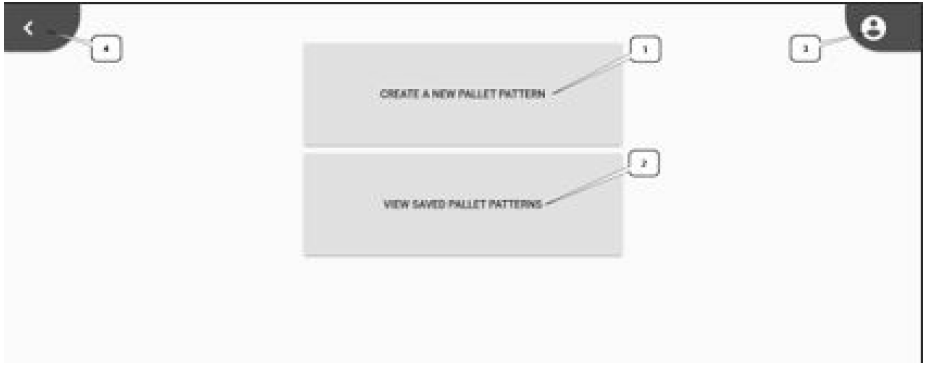
1. Create a new pallet pattern: tap and a new pattern configuration process will start.
2. View saved patterns: tap and a list of already created patterns will be displayed but will also send
pattern to the robot.
3. Option menu: Configuration options.
4. Exit button: tap to exit and the HMI main screen will appear.
1.2. Create a new pallet pattern
Tap create new pattern and the following page will appear.
Basic tab - where the following information is displayed:
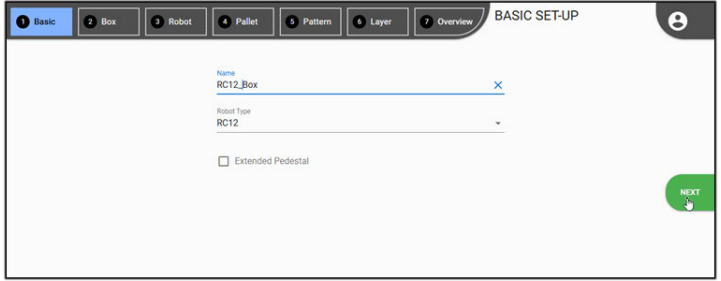
• Name: Pattern name chosen by the user
• Robot type: Chose your robot type. (Flexlik offers several different robot types)
• Extended pedestal: optional, if extended pedestal is used for the robot in question. The extended pedestal is not optional for all robot types.
The following tabs should be filled in:
Box tab
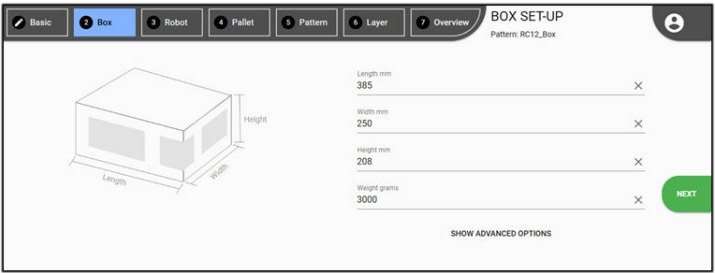
Fill in the following parameters for the box that should be palletized: length, width, height and weight.
Tap the advanced option to reach the following settings:
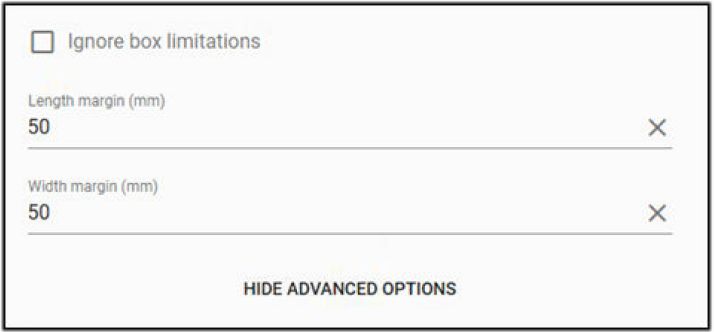
To ignore the standard box limitations check the "ignore box limitation" check box. This is used mostly for customizations. With the check box checked there are no limitations.
Standard box limitation for Robot config are:
• Length: 100-600 mm
• Width: 100-480 mm
• Height: 100-480 mm
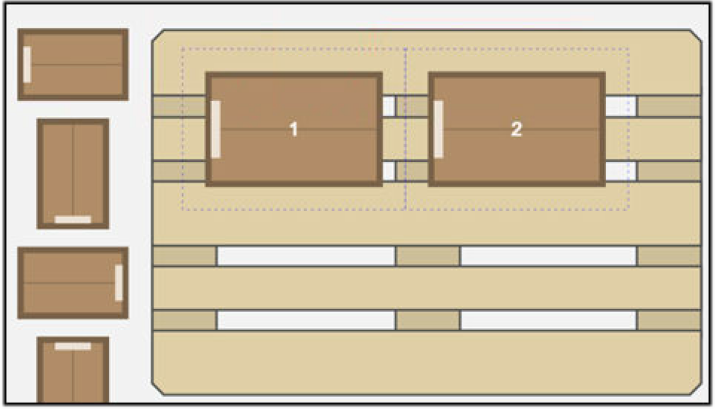
The length and width are set/changed to extend the box size margins e.g. when the boxes are in bad condition and the precise dimensions are hard to provide.
Robot tab
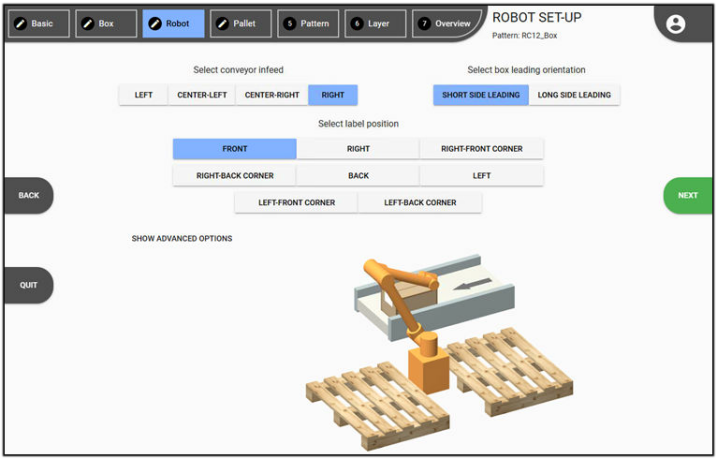
1. Select the lable position. With a known position of the lable the robot will replicate the position
during palletazing.
2. Select the robot infeed: Choose your conveyor type
NOTE:
For RC10 and RC12 the following types are applicable: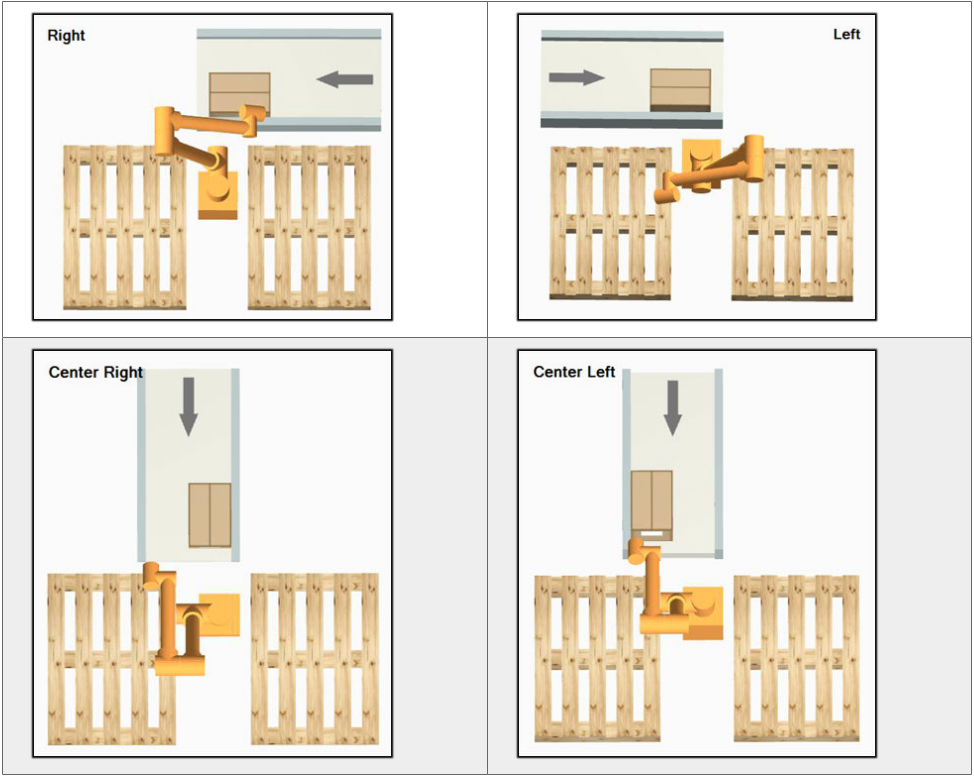
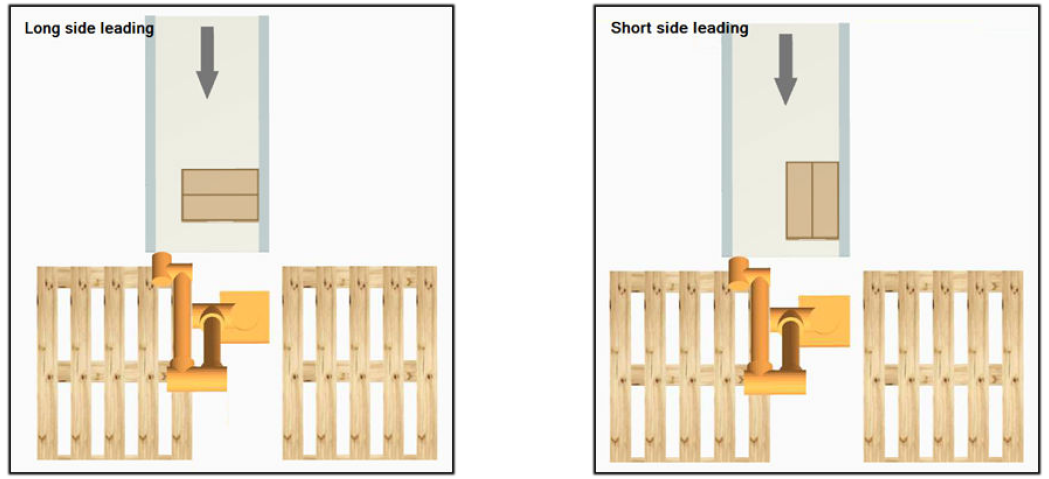
3. Select box leading orientation: How the box is oriented on the conveyor.
Pallet tab:
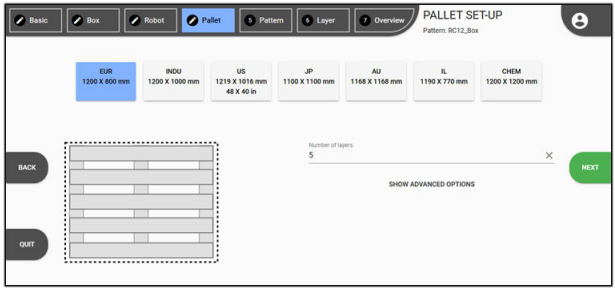
• Chose the pallet you are using for the palletizing pattern. Several types can be chosen.

• Number of layers: Type the numbers of layers for the palletizing.
• Advanced options:
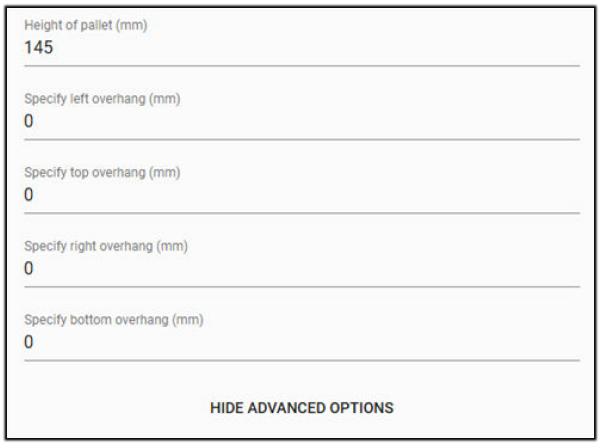
It is optional to set the height of the pallet.
If the box should have an overhang from the pallet it should be set on this page.
NOTE: Types of overhang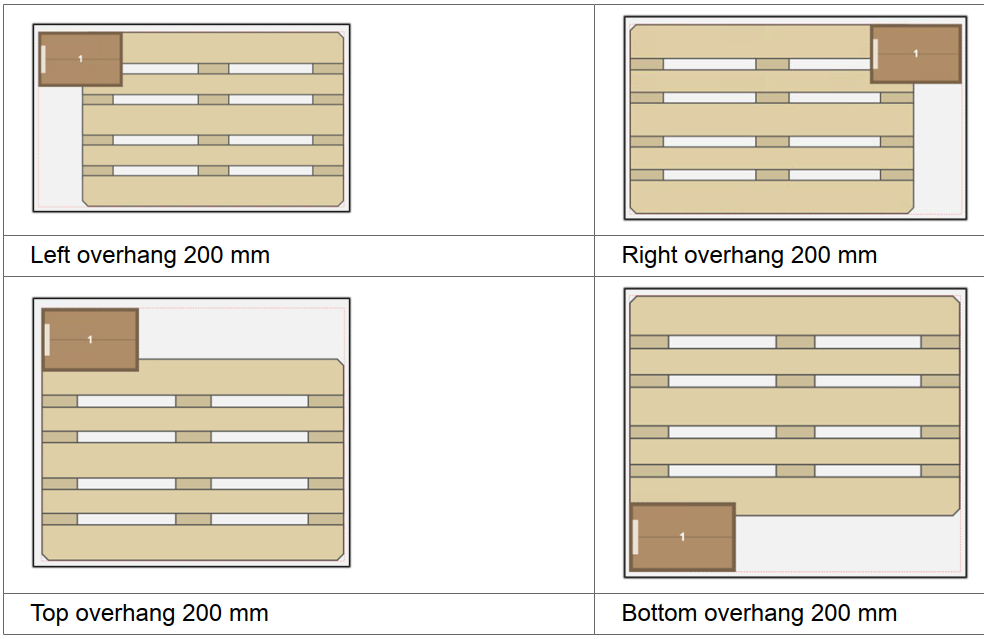
Pattern tab:
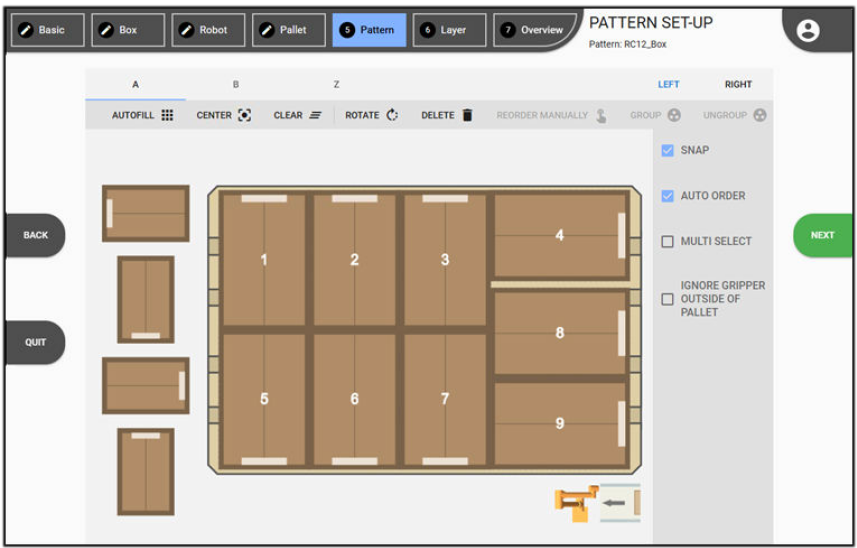
Top menu:
• A: First and every next odd layer on pallet (position can be changed on layer page).
• B: Second and every next even layer on pallet (position can be changed on layer page).
• Z: Top layer.
• Left: Pattern on the left side of the robot.
• Right: Pattern on the right side of the robot
Middle menu:
• AUTO FILL: Automatically create a pattern.
• CENTER: Center on pallet, the entire layer.
• CLEAR: Remove all boxes from pallet.
• ROTATE: Rotate selected box.
• DELETE: Delete selected box.
• REORDER MANUALLY: Manually select the number to the box.
• GROUP: Optional function to group two boxes for double pick.
• UNGROUP: Remove grouping.
Right menu:
• SNAP: Snap boxes to other boxes or to pallet limits.
• AUTO ORDER: Automatic numbering of the boxes.
• MULTISELECT: Select boxes for grouping
Layer tab:
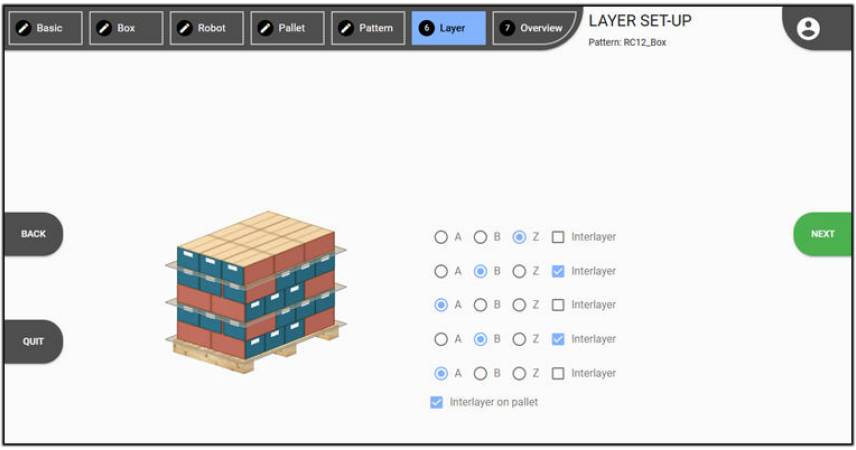
Here the user can provide information for the different layer types; A, B, Z and interlayer (in the standard robot the interlayer must be placed manually.
Overview tab:
This page shows the summary of the pallet information.
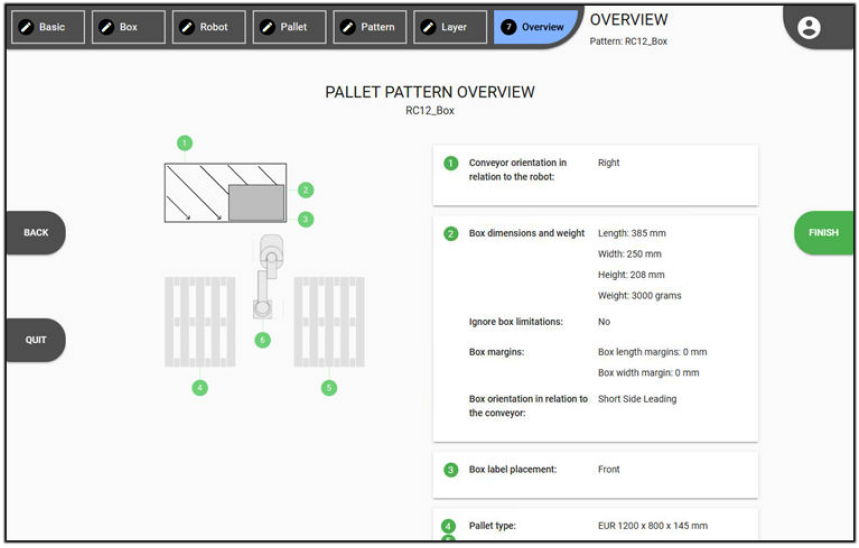
1.3. View saved pallet patterns
In this view the existing pallet patterns are displayed.
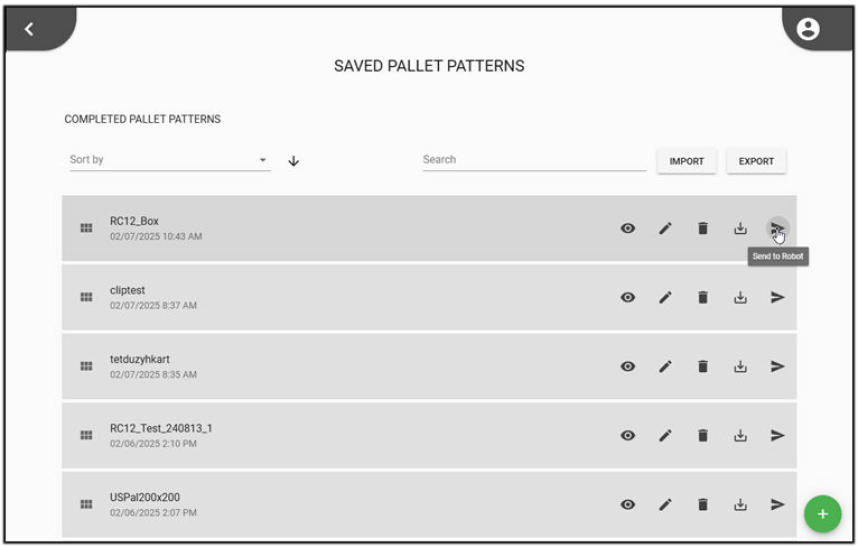
In this page it the following is possible for each pattern:
Export, Import, view pattern details, edit, delete, download and send to robot.
NOTE: Send pattern behavior When a pattern is sent different messages can be displayed. • The pattern was sucessfully sent. (Green)• The patten cannot be sent due to communication problems, check the connection settings. (Red)
• Pallet pattern is not finished and can not be sent. Finish the patter information and try again. (Orange)

Option menu
The following settings are found in the option menu and will be described in this section.
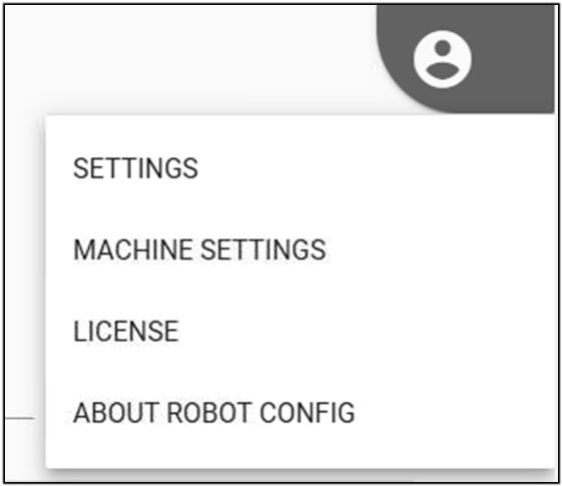
Settings: Advanced settings that should not be changed.
Machine settings: Information regarding the robot type , gripper etc.
License: Expiration date for the license.
About Robot configuration: A summary of the robot config revision and QR code, is displayed for easy access.