
When the robot hits an obstacle with the safety shroud the shroud falls down from the magnet and the
two sensors stops the movement of the robot arm.
Procedure for the robot in recovery mode:
1. Check the status of the robot arm LED ring.
2. Press and hold the FREE button, if the LED is flashing white and yellow, to release the robot breaks and manually move the robot arm from the collision area.
NOTE: The free button has two positions, first press and hold to release the breaks and enable manual move, the second press blocks the breaks and disables manual move.3. Press and hold the Reset button on the control panel.
4. Make sure the robot LED has a steady white light.
5. Start the robot.
Procedure for the robot when it is not in recovery mode:
1. Check the status of the robot arm LED ring.
2. If the LED is off: position the shroud is correctly positioned on the gripper.
3. Press and hold the reset button for three seconds.
4. If the LED still is off; remove the shroud from the sensor for five seconds.
5. Put the shroud back in place and make sure both sensors are covered by the shroud at the same time.
6. Press and hold the reset button for three seconds.
7. If the LED is flashing white and yellow, proceed with the procedure for the robot in recovery mode.
8. If the LED is steady white; Use the HMI and go to the Adjustment tab and tap Calibration.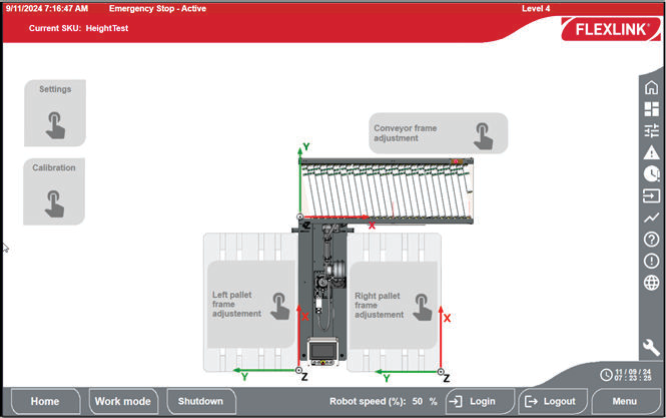
NOTE If needed; log in as maintenance (main).9. Tap on Manual to change to manual mode.
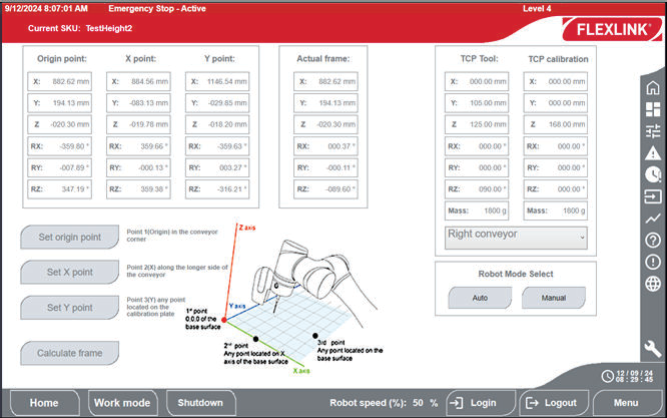
10. If the LED has a green steady light press and hold the FREE button to move the robot arm outside the collision area.
NOTE The free button has two positions, first press and hold to release the breaks and enable manual move, the second press blocks the breaks and disables manual move.